There are moments when that humming giant in the corner of your kitchen, the refrigerator, doesn't seem to be in sync with the rest of your appliances. These hiccups can be perplexing, leading many to wonder if they need to book a repair service immediately.
Before you rush into spending your hard-earned money on professional assistance, it might be worthwhile to consider some do-it-yourself repair techniques. With a little bit of time and patience, you might find the problem is simpler than it seems.
In this guide, we explore the basic principles of fridge repair. From understanding what makes your kitchen's backbone tick, to tackling some of the most frequent problems that cause headaches, these insights can empower you to fix issues before they escalate into costly repairs.
- Understanding the Basics
- Common Fridge Issues
- Essential Tools and Supplies
- Step-by-Step Troubleshooting
- Safety Tips and When to Call a Pro
Understanding the Basics
The refrigerator is more than just a cold box in your kitchen; it's an intricate system designed to keep your food safe and fresh. At its core, simplifying the complex, it's a machine that transfers heat from the inside to the outside, keeping the interior cool. To understand how to repair your own fridge, it's crucial first to grasp its basic components and how they work. The typical fridge is comprised of a compressor, condenser coils, evaporator coils, a thermostat, and a fan. These components work in unison to maintain the ideal temperature. A typical symptom, such as intermittent cooling or unusual noises, can often lead back to one of these parts. Knowing which part does what is the first step in diagnosing what could be wrong.
A compressor is the heart of any fridge repair story. Unlike a beating heart, it doesn’t directly keep things moving but instead compresses refrigerant gas, turning it into hot gas under high pressure. This is the starting point of the cooling cycle. What follows is the journey through the DIY fridge fix basics: the gas travels through the condenser coils usually found at the back or underside of your fridge, where it cools and becomes a liquid. It then passes through the evaporator coils, where the liquid absorbs heat from the fridge’s interior, vaporizes, and heads back to the compressor. Thus, the cycle continues, maintaining the fridge’s cool demeanor. In truth, understanding the amplitude and the rhythm of this process reveals much about why your fridge might not be dancing to the correct tune.
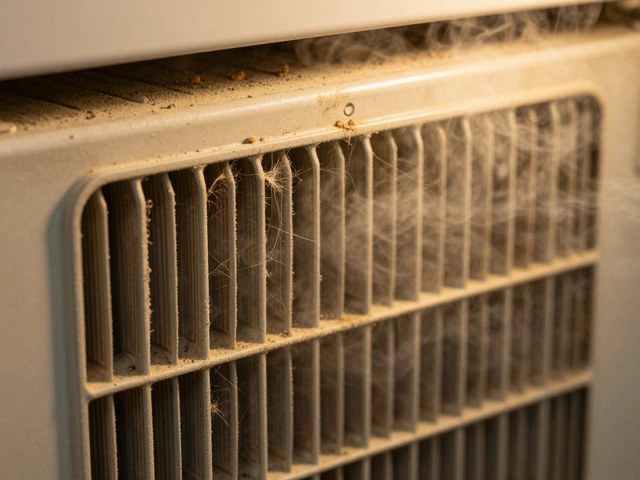
Home appliance repair isn’t just about addressing failures; it's also about prevention and knowing the limits of your equipment's endurance. For instance, a fridge works most efficiently when it's about 75% full, allowing cool air to circulate evenly but not overly taxing the system. In spots like the average American home, where fridge-door openings are frequent because of family members constantly on the prowl for snacks, every opening briefly disrupts the cooling cycle, calling for the compressor to work harder temporarily. This knowledge primes a DIY enthusiast to set up efficient routines for usage and maintenance, even before contemplating screwdriver and toolkit solutions. Regular cleaning of the condenser coils, for instance, can often prevent bigger issues. Simple tasks like these elucidate the heart of refrigerator troubleshooting.
"Refrigerators run 24/7," an appliance engineer once noted in a well-respected industry journal, "so routine maintenance can extend their life by several years." These words reinforce that vigilance, more than random tinkering, yields the best results.
By understanding these fundamentals, you become better equipped to tackle issues before they balloon into larger problems. A comprehensive knowledge of how your fridge operates not only helps with current repairs but also aids in preventing future mishaps. Whether you're easing a mild inconvenience or fending off a full-blown crisis, knowing your fridge inside and out is the first step in effective maintenance and repair. Take note of any strange new sounds, as even a slight change can be the first sign of distress in your fridge’s gentle humming. The objective isn't just to fix what's broken, but to appreciate and respect how these machines work tirelessly to keep our foods fresh. After all, a well-maintained fridge is like a faithful steward to the household's food supply.
Common Fridge Issues
An average household relies heavily on the refrigerator, making it one of the essential appliances in daily life. It's always running quietly in the background, storing food and keeping perishable items fresh. However, like any mechanical device, it's prone to developing issues over time. Understanding common problems can save you a headache and even money. Knowing what to look for can keep your beloved fridge running more efficiently for years to come.
One typical issue is the fridge making unusual noises. Sometimes, refrigerators produce a symphony of sounds that might make you feel like you've got a budding musician in the kitchen. These noises, ranging from loud banging to soft humming, can be traced back to a variety of causes. A gentle hum often indicates the motor is working correctly, but loud banging or knocking sounds might suggest compressor issues or that the fan blades are striking something. A piece of advice is to inspect the freezer fan for any obstructions and make sure it's not covered in ice.
Inconsistent Temperature
Have you ever opened your fridge to find that your milk feels warmer than usual? Inconsistent temperature within the fridge compartment is undoubtedly inconvenient. It might indicate a faulty thermostat or that the temperature control board isn't functioning correctly. Before diving into repairs, check if the door seals are closing tightly. A broken seal can allow warm air to enter, disrupting the internal temperature balance. A trick many swear by is the dollar bill test; close the door on a dollar bill and see if it slides out easily. If it does, your door seals might need replacing.
According to Consumer Reports, "Refrigerators last an average of 13 years, but regular maintenance can extend this lifespan significantly."
Leaks are another common grievance. Discovering water pooling around your refrigerator is never a welcome sight. This can be caused by issues ranging from a blocked defrost drain to a malfunctioning water filter or a cracked water supply line. To tackle defrost drain issues, locate the drain at the bottom of the fridge and clear any ice or debris buildup using warm water.
Rapid Food Spoilage
Rapid food spoilage can often be a telltale sign that something's amiss. If fruits and vegetables turn bad faster than they should, it's a signal that your fridge's cooling abilities aren't up to par. Check if your fridge's back wall is covered in ice; if so, this may mean there's a problem with the defrost heater. Also, consider adjusting the fridge's temperature settings to optimal levels, typically around 37°F for the fridge and 0°F for the freezer.
If you ever notice any of these issues, remember that some can be resolved with minor tweaks, while others may require more in-depth troubleshooting or even professional intervention. By staying informed, you'll be in a better position to identify and rectify problems early, ensuring that your appliance continues to serve you faithfully.

Essential Tools and Supplies
When you're gearing up to tackle a DIY fridge repair project, having the right tools and supplies on hand can make a world of difference. Think of it like this: you wouldn't try to cook a gourmet meal without the proper utensils, right? The same logic applies to fixing refrigerators. A simple toolkit can often transform a daunting repair job into something surprisingly manageable.
One of the fundamental tools you should have is a multimeter. This handy device allows you to check for electrical issues within your fridge by measuring voltage, current, and resistance. Along with the multimeter, you might want to invest in a set of screwdrivers, both flathead and Phillips. Having several sizes ensures that you can access even the smallest screws tucked away inside your appliance.
Another key item in your toolbox should be an adjustable wrench. Fridges contain many components that require tightening or loosening nuts and bolts, and an adjustable wrench can adapt to different sizes, providing versatility. Similarly, pliers can be beneficial, especially needle-nose pliers, which help reach and manipulate small parts or wires. Additionally, having a wire stripper at your disposal allows you to safely handle any wire repairs.
Here's where we bring in some unexpected heroes of the repair world: a flashlight and some paper towels. A flashlight won't just illuminate dark corners avoiding nasty surprises; it will help you spot potential issues that might otherwise go unnoticed. Equip yourself with paper towels to clean up any unexpected spills or leaks you discover during your inspection.
Intriguingly, in a study conducted on home appliance repairs, it was found that 60% of successful DIY repair attempts involved using basic household tools and materials rather than specialized equipment. This fact emphasizes the potential for average homeowners to manage repairs independently.
Refrigerator troubleshooting often requires you to disconnect parts to test them individually. For this reason, having replacement parts like thermostat sensors or door seals at the ready can prove valuable, since some components are known for wearing out over time. While purchasing these parts might seem premature, it's much better than scrambling midway through the process. You can often find reliable parts suppliers online, saving time and effort when things are critical.
A few other essentials include duct tape and a cleaning brush. The former can temporarily hold parts together or close off drafts to check for air leaks properly, while the cleaning brush makes it easier to clean coils and vents. Dirty coils can make your fridge work harder than necessary, so keeping them clean can save on energy bills too!
If you pair these tools with determination and patience, it’s surprising what you can achieve. The task may initially seem daunting, but armed with the right gear, you’ll find that many issues are not only solvable, but they’re also opportunities to learn and grow your handyman skills. Embrace the process, and who knows—you may even begin to enjoy the art of home appliance repair.
Step-by-Step Troubleshooting
When your fridge exhibits signs of trouble, the first step is not to panic but to approach the issue methodically. Begin by identifying the symptom, which is often your best clue to the underlying cause. A common issue is the fridge not cooling properly. If this is the case, check if the door seals are intact and not letting warm air in. Sometimes, a worn-out gasket can be the culprit that disrupts the optimal cooling performance. Clean the seals and ensure they close tightly.
Listening Closely
Another prevalent problem is strange noises coming from the back. Your fridge’s motor and compressor make a soft hum when working efficiently. However, if you hear rattling or buzzing, it could signal that something is amiss. Investigate for loose components or debris that might have fallen and become stuck near the fan. Gently clean around the fan and see if that alleviates the noise. Checking this part regularly can prevent minor nuisances from turning into major faults that require costly parts replacement.
Checking the Thermostat
Temperature inconsistencies can often be traced back to the thermostat. Over time, a thermostat might lose sensitivity or remain stuck on a warmer setting. Turn the thermostat to the coldest setting and listen for an audible click. This sound indicates it is working properly. If you don't hear the click, you may need a replacement. Investing in a new thermostat is relatively inexpensive and a task that many DIY-enthusiasts can manage without professional help.
Investigating Leaks
Leaking is another issue that demands immediate attention. Begin by checking the water line, especially in models equipped with ice makers. Misalignments or small cracks along this line are common causes of puddles. If the line appears fine, inspect the drip pan and defrost drain. Clogs in these areas can cause water to pool inside and eventually find its way to your floor. A simple cleaning can often resolve these water woes and save your flooring from further damage.
Basic Reset and Power Check
Sometimes the simplest solutions prove the most effective. A basic power cycle might reset components that have momentarily glitched. Unplug the fridge for a few minutes, then plug it back in. Doing this can calibrate sensors and regulators that manage function. Ensure also that the power cord isn’t frayed or securely connected, as an unstable power supply can impact the entire appliance operation. Something as easy as ensuring the plug is snugly in can surprisingly formulate a fix.
Embarking on DIY repair not only saves money but provides a satisfying sense of accomplishment. Yet, remember that safety is paramount; if you encounter issues beyond basic troubleshooting, consulting a professional remains the best course of action. Additionally, keeping your fridge well-maintained can extend its lifespan, making the occasional repair effort all the more worthwhile.

Safety Tips and When to Call a Pro
When tinkering with any electrical appliance, including your trusty fridge, safety must be your foremost concern. Before embarking on any DIY fridge repair, ensure that the appliance is unplugged. This one critical step can prevent dangerous electrical shocks. It's often tempting to skip the simpler steps in favor of speed, but removing the power source is a non-negotiable in any repair process. Always work in a well-lit space with ample room to maneuver, and have a fire extinguisher within reach, ideally one that's rated for electrical fires. Don’t forget to protect your eyes and hands with goggles and gloves, too.
Another crucial aspect to inspect is the presence of toxic substances, such as refrigerants that can leak if you're dealing with more extensive repairs. These can be harmful if inhaled or if they make contact with skin. It's essential to be aware of where the refrigeration lines are and to avoid disturbing them if you're unsure about what you're doing. Remember that any attempt to fix a leak should ideally involve calling a professional, especially because handling refrigerants often requires a specific license by law.
The list of common fridge woes is long, but understanding the type of issue you're dealing with is pivotal. For example, a consistently warm fridge could be due to a faulty compressor, often beyond the scope of amateur repair. Should your DIY endeavors fail to diagnose or resolve the problem, it's time to turn to a professional. Pay attention to unusual noises; crackling sounds might be harmless, but loud banging or hissing deserve expert review.
An insightful note from the Home Appliance Association states, “In many cases, the greatest risk isn’t the repair itself, but rather what can happen if you don’t have the problem correctly assessed by a professional. Avoiding a professional evaluation can sometimes lead to more costly repairs in the future.”
Ultimately, knowing when to back off and leave it to the pros is just as important as having the know-how to attempt a fix. If your fridge issue involves extensive disassembly or specialized tools, it’s likely beyond home repair. Always consider the age and condition of the appliance as well. Sometimes, frequent issues mean it's time for an upgrade. When the fix becomes too costly or complex, weighing your options can save you more than just headaches.
| Common DIY Repairs | When to Call a Professional |
|---|---|
| Leaky Door Seals | Refrigerant Leaks |
| Replacing Light Bulbs | Electrical Wiring Issues |
| Cleaning Coils | Compressor Problems |
| Unclogging Drain Lines | Significant Temperature Fluctuations |

