Replace Extractor Fan – Quick DIY Guide
If your extractor fan sputters, whines, or just won’t turn on, it’s probably time for a replacement. A good fan keeps steam, smells, and moisture out of your kitchen or bathroom, so fixing it fast makes a big difference. Below you’ll find plain‑English steps to swap the unit yourself, plus tips on when to call a professional.
When Should You Replace Your Extractor Fan?
Not every glitch means a full replacement. Check these signs first:
- Fan runs but makes a loud grinding noise – the motor or blades are worn.
- It turns on for a few seconds then stops – the internal capacitor has failed.
- No airflow at all despite the motor humming – the fan blade may be broken or blocked.
- Visible rust, broken housing, or a cracked light cover – safety hazard.
If you see any of the above, a new fan will likely solve the problem. A fresh unit also improves energy efficiency, which can lower your electricity bill.
Step‑by‑Step DIY Replacement
1. Gather tools and a replacement fan. You’ll need a screwdriver (usually Philips), a drill (optional for new mounting holes), and a ladder or sturdy stool. Choose a fan that matches the size of the existing opening – most homes use 100 mm or 150 mm ducts.
2. Turn off power. Switch off the circuit breaker that feeds the fan. Double‑check with a voltage tester; you don’t want a surprise shock.
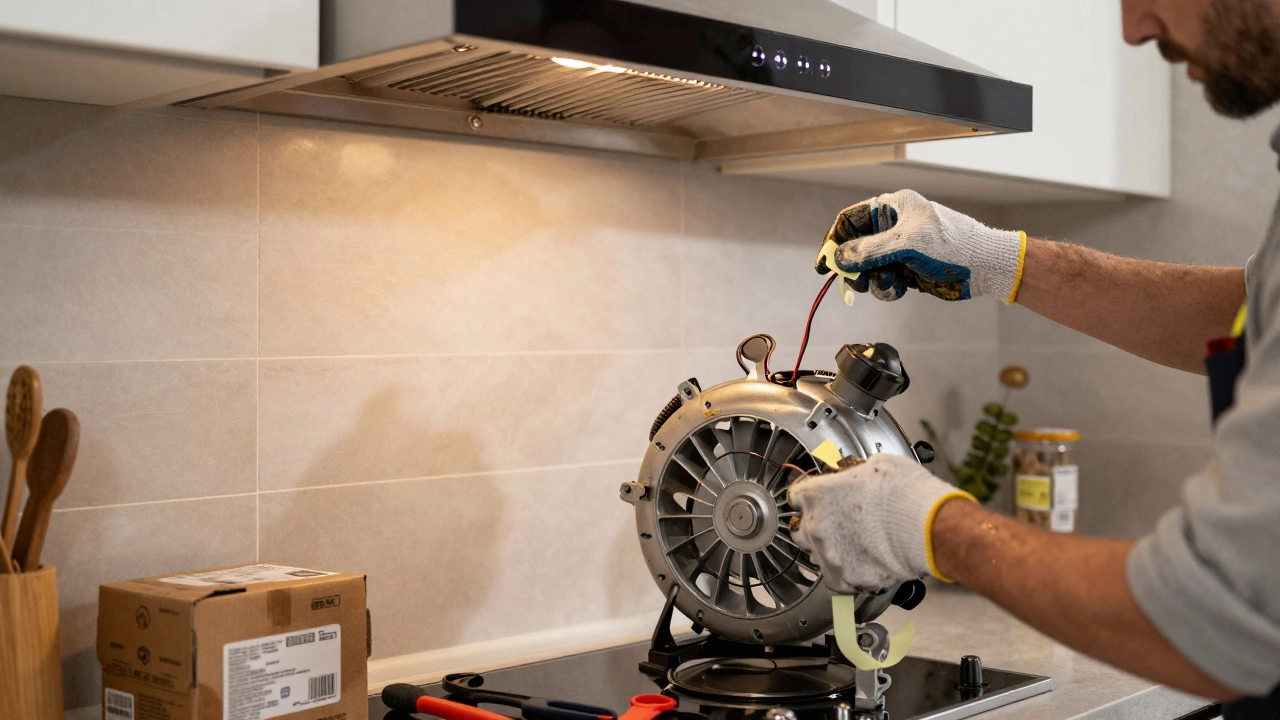
3. Remove the old fan. Unscrew the cover grille, then disconnect the wiring. Most fans have two wires (live and neutral) plus a ground. Take a photo of the connection before you unplug it – it helps you wire the new unit correctly.
4. Detach the housing. The fan is usually bolted to the ceiling or wall. Remove the bolts and pull the unit out, watching for any hidden ductwork.
5. Prep the opening. Clean out dust and debris. If the new fan is a different depth, you might need to add a short section of duct or a spacer to keep the housing flush.
6. Install the new fan. Position the new housing, line up the holes, and bolt it in place. Re‑connect the wires exactly as they were – live to live, neutral to neutral, ground to ground. Tighten the terminal screws firmly.
7. Fit the grille. Snap or screw the new cover on. Make sure it sits flat and seals around the duct to stop leaks.
8. Test the fan. Turn the breaker back on and run the fan. Listen for smooth operation and feel for airflow. If everything’s quiet and strong, you’ve done it right.
9. Clean up. Dispose of the old fan according to local recycling rules. Store any extra screws for future use.
Most DIY replacements take under an hour, and the cost of a decent fan ranges from £30 to £80. If you hit any of these roadblocks, consider calling a pro:
- Complex wiring or a fused circuit.
- Hard‑to‑reach ceiling joists that need extra support.
- Signs of water damage that could affect the new motor.
Professional installers can also ensure the fan meets local building codes, especially in rented properties.
Ready to get rid of that noisy fan? Grab a replacement, follow these steps, and you’ll have fresh airflow in no time. And if you ever need a quick check on why a fan stopped, our article “Extractor Fan Stopped Working? Quick Fixes and Causes Explained” breaks down the most common issues before you decide to replace.
How to Replace Kitchen Extractor Fan Motor: A Step-by-Step Guide
- Alden Wilder
- Mar 23 2026
- 0 Comments
Learn how to safely replace a faulty kitchen extractor fan motor with step-by-step instructions, part selection tips, and common mistakes to avoid. Save money and restore ventilation without replacing the whole hood.
View More
How Hard Is It to Replace an Extractor Fan? DIY Guide & Tips
- Alden Wilder
- Jul 9 2025
- 0 Comments
Thinking of swapping out your extractor fan? Discover if replacing an extractor fan is tough, what skills and tools you need, and insider tips for a smoother job.
View More