Homeowners tend to ignore their extractor fans until they screech, rattle, or just stop working—leaving behind the steamy air, sticky odours, or worse, a growing patch of mould on the ceiling. But here’s the thing: swapping an old extractor fan for a new one isn’t rocket science. The trick is knowing when you’re up for it, and when you should just call in a pro. If you’re tired of condensation on your bathroom mirror or lingering kitchen smells that refuse to budge, you’ve probably thought about replacing that fan yourself. But how hard is it really?
What Makes Replacing an Extractor Fan Seem Hard?
Extractor fans look like these boring, simple things on the wall or ceiling—just a plastic square or round grille, right? But once you peel back the cover, things aren’t always so basic. First off, there’s electricity. Messing with wires freaks people out, and honestly, it should, at least a little. A 2022 survey by Safe Electric Canada found that less than 40% of Canadians feel comfortable replacing a light switch, let alone a fan that’s hardwired into the same circuit.
Then you’ve got the question of fit. Old fans from the 90s or early 2000s can have odd sizes that modern replacements don’t match perfectly. So you might end up with a too-small or too-big new fan, and now you’re patching drywall or trimming holes, which turns a one-hour job into a messy afternoon. Another curveball? Some fans are vented straight outside, others go through flexible ducts that love to tear, sag, or pop off behind the drywall so you can’t easily reattach them. I’ve crawled into too many musty attics in Vancouver to know how frustrating bad ducting can get.
Finally, the old fan might connect to a timer, humidity sensor, or light. Modern fans might need a neutral wire or different connections if you want things like continuous low-speed operation or smart controls. It’s not impossible to deal with, but it adds steps. And let’s be honest—most of us only want to remove a couple screws and pop in an upgrade, not rewire half the bathroom.
Tools, Skills, and Prep Work: What You Really Need
If you’re the handy type with a couple of basic tools, you’re already halfway there. At the very least, you’ll need:
- Screwdrivers (flat and Phillips) for prying off the cover and removing mounting screws
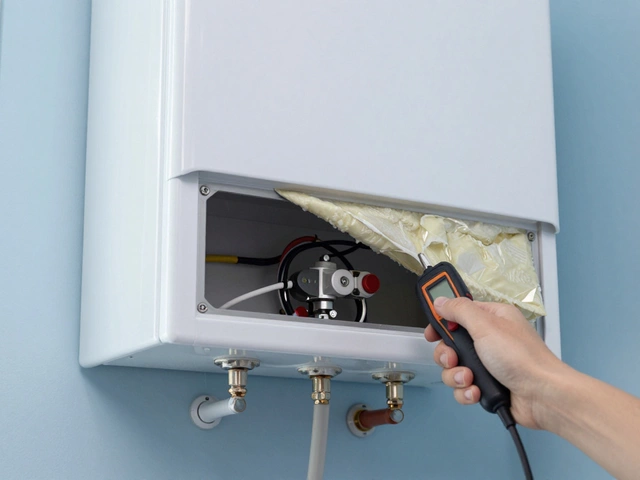
- Voltage tester—seriously, don’t skip this step. Even if you shut off the breaker, always double-check the wires aren’t live.
- Wire strippers and wire nuts, for connecting new wires cleanly.
- Pliers for tugging out stubborn wires or holding the old unit steady.
- A drywall saw or oscillating tool if the hole needs expansion (sometimes new fans are slightly bigger).
- Drill (nice to have, not a must) for securing challenging mounting plates.
You’ll also want a ladder (if the fan is ceiling mounted) and a drop cloth in case insulation, debris, or mystery gunk falls out. If the fan vents to the outside, check the grate for wasp nests or lint buildup—nobody likes a home reno interrupted by angry insects.
Skill-wise, if you’ve hung a light fixture or replaced an outlet, you can handle this. The wiring connections are similar, but you’ll want to label or snap a picture of the old wiring before disconnecting it. That way, you’re not guessing what wire goes where after you’ve forgotten ten minutes later. If you’re dealing with really old wiring (1940s-1970s), be careful: colors and standards were not what they are now. Some wires may be brittle or have odd insulation, and that can be risky. Call an electrician if you see fabric-covered wires or anything crumbly.
Oh, and pro tip: measure your existing fan housing before heading to the store. Bring the old fan if you can. Nothing’s worse than making three trips to Home Depot because the new fan doesn’t fit the existing opening.

Removal and Installation Steps—DIY Breakdown
If you’re brave and ready, here’s how it usually goes down:
- Turn off power at the breaker. Double-check with your voltage tester—even if you 'think' it’s off, don’t risk it.
- Remove the fan cover. Usually this means squeezing side clips or unscrewing the faceplate.
- Unscrew or unclip the fan body. Many older fans will have two to four screws holding the motor unit to the mounting bracket or directly to a joist. Warning: it might be stuck with a bit of paint or caulk.
- Carefully disconnect wiring. Label the wires, or take a quick phone picture. Loosen wire nuts and separate connections.
- Detach ducting. Ducts are mostly attached with metal tape or a zip tie. Watch for dust, and try not to crush or tear it. If it’s loose or damaged, replace it—you’ll boost the airflow of your new fan.
- Remove the old fan housing, if needed. Sometimes you have to climb into the attic or above the ceiling to remove screws or nails holding the housing to framing.
- Adjust the hole. If your new fan is bigger, carefully enlarge the opening with a drywall saw—don’t cut into wires or pipes!
- Install the new housing. Secure it to the joist or use the mounting bracket supplied.
- Reconnect the duct and wiring according to the new manual. Double-check connections, especially if your new fan adds any features like timers or lights. Use wire nuts and electrical tape for a snug fit.
- Screw in the new fan motor and snap on the cover. Flip the breaker, check for proper operation, and make sure you feel suction at the fan or exit vent.
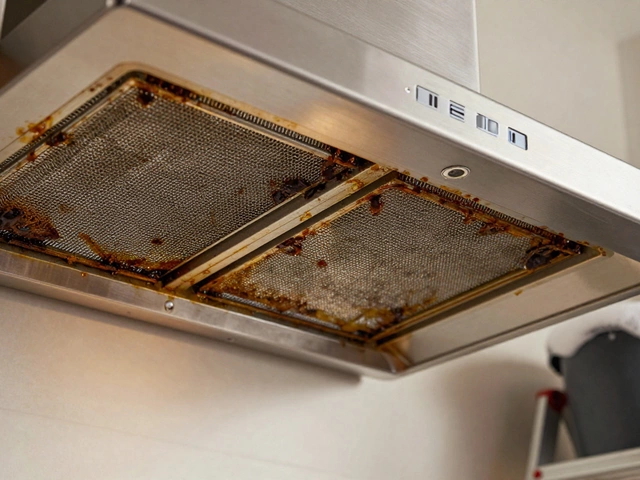
If it’s a wall-mounted kitchen fan, steps are almost the same, but you’ll want to wear gloves—grease and food can get trapped behind. For a tricky job with no attic access, a pancake-style fan replacement (slimmer profile) can help avoid major drywall patching.
Trouble Spots: When to Get Help
Sometimes, despite optimism and prep, the project starts revealing weird surprises. Maybe there’s no duct—or worse, ductwork dumps moist air into your attic or inside a wall. That’s not just wrong—it’s a recipe for rot and mould. Statistics from the Canadian Mortgage and Housing Corporation estimate nearly 20% of older Vancouver homes have bathrooms vented the wrong way. If that’s you, stop and reroute the duct properly, either to a vent hood/flap on the exterior wall or roof. It usually needs drilling a new hole and sealing the edges to prevent drafts and water leaks.
Electrical quirks are another red flag. If wires spark, insulation flakes, or you find aluminum wire (common in houses built in the late 1960s to mid-70s), call a licensed electrician. Mixing aluminum and copper wires without proper connectors is a fire hazard. Similarly, if your new smart fan wants extra wires—like for constant low-speed operation or humidity sensors—and your old fan had only one, you’ll need to run new wiring, usually through the attic or wall. That’s a level above simple fan swapping.
Unexpected repairs often pop up. Maybe the old fan was barely hanging on with a rusty bracket; you might discover water stains, mould, or warped plywood. My rule is: fix the cause, not just the symptom. If the bathroom is steamy even after installing a better fan, check the size—most bathrooms need an extractor fan rated for at least 50 cubic feet per minute (CFM), but larger baths or those with showers will want 80-110+ CFM. Here’s a quick reference chart:
| Bathroom Size (sq. feet) | Recommended Fan CFM |
|---|---|
| Up to 50 | 50 |
| 51-75 | 70-80 |
| 76-100 | 90-100 |
| Over 100 or with jacuzzi tub | 110+ |
This matters because an underpowered fan won’t clear out moisture quickly enough after showers. Local Vancouver building code requires a minimum of 50 CFM for all new bathroom fans, but upgrading to a stronger one is wise in humid climates, especially if you get foggy windows in the winter.
If you spot wildlife (bird nests in the vent, for example), deal with it first—don’t just shove it aside. Birds and squirrels love nesting in poorly capped vents, especially in spring. Exclusion and mesh covers are your friends.
Insider Tips for a Smooth Replacement
The secret to an easy extractor fan replacement is planning. Buy your new fan before removing the old one, so you can compare screw locations, housing depth, and wire placement. If you’re unsure, bring the whole beat-up fan to the hardware store. Fans now have useful packaging info like sound ratings—measured in sones. The lower the sone number, the quieter the fan. For context, older fans might be 4.0 sones or higher (loud as a cheap box fan), while newer, quiet models are under 1.5 sones. Most people prefer something in the 1-3 sone range for a good balance between cost and quiet.
Always use metal duct tape (not regular duct tape, ironically) to reseal connections. This keeps air flowing where you want it and stops leaks that waste energy and suck warm air into cold areas in winter. If the duct is crusty or sagging, swap it for an insulated flex duct—it’ll help prevent condensation and heat loss, especially in our chilly Vancouver winters. When you put on the new fan’s decorative grille, vacuum away any sawdust or loose debris first for a professional finish.
Here’s a little trick: when mounting the new unit, drive the screws in halfway before tightening. That lets you adjust the housing and make sure it’s level and snug before locking in place. Another: put a few drops of 3-in-1 oil on older duct flaps or wall dampers so they close quietly instead of clanking or sticking. You’ll thank yourself for years to come.
Once your fan’s in and running, remember to clean the grille and blower every few months. Dust, lint, and hair build up faster than you’d expect. A simple wipe or vacuum keeps the fan running strong—and you won’t get that burnt-dust smell next time company visits. A 2023 home energy study found fans with clean blades and unobstructed ducting use 10-15% less power and last up to two years longer than neglected ones.
Replace extractor fan projects don’t have to be a headache. Understanding the wiring, preparing your tools, and treating the ductwork with respect are the big three. If your situation checks all the easy boxes, most people can handle the swap in an hour or two. Having a buddy to help (especially reaching a ceiling fixture) never hurts. But if you stumble across old wiring, bad ducts, or hidden mould, don’t feel bad about calling a pro. The cost usually runs $100-$400 for a simple swap, while a messy repair (like a new duct run) might go $500 or more. Either way, the reward is clear air, a quieter home, and never having to wipe down wet mirrors again.