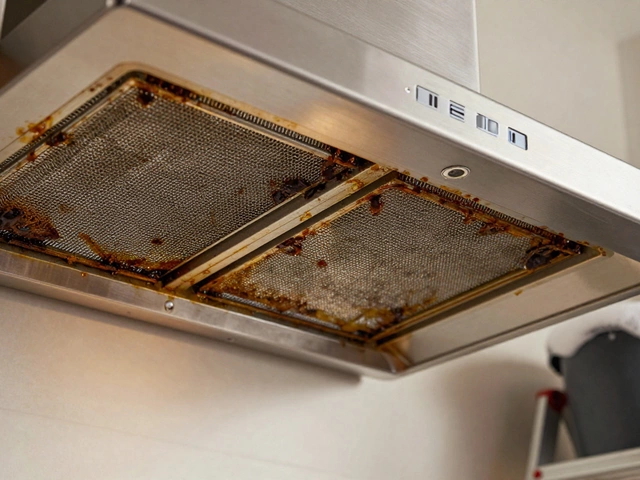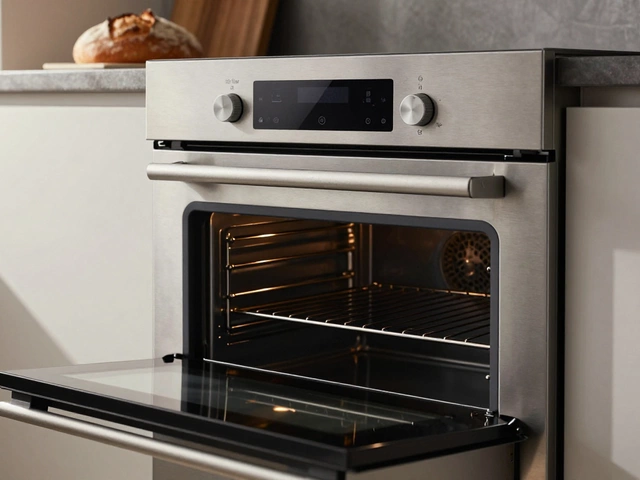
Picture this: it’s a rainy Vancouver evening, your stomach’s rumbling, and you pop a frozen pizza in the oven. Ten minutes later, you crack the oven door—and nothing. The cheese is still icily unmelted, and there’s zero warmth. No, you didn’t forget to preheat. This is classic heating element failure. Annoying? Absolutely. Wallet-busting? Let’s just say it can range from a quick fix that won’t wreck your budget to something that stings a bit more, and it pays to know the real numbers, not some vague Google snip.
The Real Cost of Replacing an Oven Heating Element
The first thing people ask is, “How much is a heating element, really?” You’re not alone—this is one of the top appliance repair questions in Canada. The short answer: if you’re just buying the part and doing it yourself, most oven heating elements cost somewhere between $30 and $80 CAD. Yes, a few outliers exist for high-end brands like Viking or Wolf, which can go north of $150, but your standard Whirlpool, GE, Frigidaire, or Samsung part hovers in that $30–$80 sweet spot. Shipping adds a few bucks, especially if your local hardware store doesn’t have the model in stock—which is common in smaller Vancouver neighborhoods.
But here’s the kicker: very few people want to poke around in a 240-volt oven. That’s where labor comes in. If you hire a professional appliance repair tech, expect to pay $120–$180 for the labor call and install. So, all in, you’re usually staring at a total bill of $150–$260 to get your oven toasty again. In Vancouver, where service rates are a tad higher than some places, it’s rare to get the total fix under $150 unless you’ve got a buddy in the business.
Why the price variation? Some heating elements are easier to access than others. For most newer electric ovens, it’s as simple as unscrewing the back panel or popping it loose from inside the oven, then switching a few wires (after turning off the breaker, of course—unless you like spicy surprises). But on older models or wall ovens, the tech sometimes needs to uninstall the oven or fiddle with tricky wiring. That can add $50–$100 in labor for extra headache.
Gas ovens are a different beast since most use a gas igniter rather than an electric element for baking, but for this article, we’re sticking with oven heating element replacement for electric ranges, since that’s about 87% of the calls repair techs get for “won’t heat” issues in homes around Metro Vancouver.
To put this into perspective, check out this table if you want a quick apples-to-apples comparison:
| Oven Brand | Average Part Price (CAD) | Typical Labor (CAD) | Total Installed |
|---|---|---|---|
| Whirlpool / Maytag | $35–$55 | $120–$150 | $155–$205 |
| GE / Hotpoint | $30–$60 | $120–$150 | $150–$210 |
| Samsung / LG | $45–$75 | $130–$170 | $175–$245 |
| Frigidaire / Kenmore | $40–$70 | $120–$150 | $160–$220 |
| Viking / Wolf | $110–$170 | $140–$180 | $250–$350 |
Hidden costs trip some folks up. If you’re dealing with a super-old oven—think avocado green relic from the seventies—the element might be “obsolete,” which means you’ll have to hunt for a third-party generic or hit up appliance salvage yards. These can be hit-and-miss, with prices that jump up fast when parts become rare. Also, if the repair tech discovers corroded wiring or a toasted control board (it happens more than you’d think), get ready for extra labor or even the suggestion to buy a new oven entirely, especially if yours is over fifteen years old.
Pro tip: Before you shell out for a new element, check your oven’s warranty. Newer ovens (under five years old) might still have a parts warranty, though most manufacturers exclude “wear and tear” stuff like elements. Still, it never hurts to check.
Troubleshooting: Do You Really Need a New Heating Element?
Makes sense to check if you actually need a replacement in the first place. Some people rush to order parts when the oven is dead cold, but sometimes there’s an easier fix. Start by looking at the element itself—unplug the oven or kill the breaker (safety first!). Bad elements usually give it away with visible clues: blisters, cracks, burnt patches, or a section that’s snapped clean off. If it looks like a cheese stick that took a wrong turn in a campfire, it’s done for.
If the element looks fine, the problem might be somewhere else: a toasted relay on the control board, a broken thermostat, or a dead oven sensor. Here’s a quick checklist for anyone tempted to grab a multimeter:
- First, unplug the oven or switch off its breaker. Never skip this step. Ovens use enough voltage to send you flying.
- Unscrew or unclip the element. On most ovens, there are two screws at the back—easy to spot.
- Gently pull the element forward—it should slide out a few inches revealing two wires. Disconnect those carefully. If you’re nervous about losing the wires in the hole, tape them down.
- Now, set your multimeter to continuity or ohms (Ω). For the average bake element, you want a reading between 10–40 ohms. If it shows infinite resistance (“OL” on most meters), the element’s toast.
This sort of test takes less than ten minutes, and even if you don’t have a meter, most hardware stores, including Home Depot and Rona in Vancouver, sell cheap $15 testers or can check the part for you.
Another tip: just because the bottom (“bake”) element works, doesn’t mean the top (“broil”) does, and vice versa. If cookies aren’t browning or pizza crust stays pale, test both. Broil elements tend to last longer, but they’re the same deal to replace—usually the same price, too.
If you discover the board or temperature probe is the problem, those parts are pricier, and swapping them isn’t a five-minute job. For control boards, the part alone can be $200–$350, nudging you toward a new range if the oven is older. But stick with the heating element whenever possible—it’s still the fastest and most budget-friendly fix.
One last check: before blaming the oven, make sure you haven’t tripped the breaker. It’s almost embarrassing how often someone books a repair only to discover a blown fuse or a tripped breaker in the garage.

DIY vs. Professional Oven Repair: What Should You Choose?
If you’re half-handy and comfortable with basics like a screwdriver and a flashlight, swapping a heating element is one of the easier home repairs out there. Countless YouTube videos walk through the process for different models. On my last element install (a Whirlpool in Mount Pleasant), the actual swap took less than fifteen minutes, and the part was $49 on Amazon. Saved at least a hundred bucks, then treated myself to sushi.
Before you get cocky, though, keep in mind that ovens really do mean business when it comes to electricity. Burnt wires or a bad install can cause shocks or even short out your new element. If there’s any doubt, skip the DIY and call a pro. In Vancouver, many small local appliance shops (not just the big guys) have techs who’ll install your part if you already bought it, usually at a reduced labor rate. Always ask first.
Here are some quick DIY tips that can help you save cash—and headaches:
- Order the right part the first time—use the model number stamped inside the oven door. Don’t trust “looks about right” guesses, as elements are shaped and sized specifically for each model.
- If searching online, try terms like "bake element" or "broil element" alongside your oven’s model number. Big retailers like PartsSelect, ReliableParts, and even Amazon.ca are good places to start.
- Grab a pair of work gloves. The old element can have sharp edges or flakes from heating, and it’s so easy to slice a finger working fast.
- Don’t force anything—if the element sticks, spray WD-40 or a rust-remover on the screws and let it soak for a few minutes.
- Jot down (or snap a pic of) how the wires connect. It’s the best way to avoid a wrong-wired install that blows your new part.
- After swapping it out, don’t forget to test the oven—let it heat up for 5–10 minutes. Watch for weird smells (sometimes normal—just burning off factory oil), but listen for odd pops or see if the element glows fully red-hot. No hot spots or smoking means you’re good to go.
Professional service still makes sense if you value time, hate the idea of possibly blowing the main fuse, or suspect there’s more going on than just a dead element. Reputable Vancouver techs guarantee their work, and many offer 90-day parts and labor warranties—handy peace of mind if you cook a lot.
One last word of wisdom: don’t try to “fix” a broken heating element by taping or bending it. This is an actual fire risk, not just a bad idea. Element metal fatigues and will snap under strain or heat, so always replace, never patch.
Knowing what to expect with costs and steps to replace a heating element in your oven can take the sting out of an annoying kitchen breakdown. Whether you roll up your sleeves or dial a local pro, it’s usually a fix that gets you back to late-night pizza nights or crisp cookies with less fuss than you’d expect.