Your oven won’t heat, dinner’s on hold, and you just want a straight answer: what’s this going to cost? Here’s the real-world breakdown, what usually drives the price up or down, and the quickest path to a fix-whether you grab a screwdriver or book a tech. Expect honest ranges, ways to save, and a few things most people miss before they spend a dime.
TL;DR cost breakdown, what affects price, and when to DIY
oven heating element replacement cost depends on the part type, brand, and whether you DIY or hire a pro. Here’s the short version.
- Typical DIY cost: $25-$120 for the element. Most common bake/broil elements land $30-$70. Time: 20-45 minutes.
- Typical pro cost: $150-$350 all-in. That usually includes a $75-$125 diagnostic fee, part, and 30-90 minutes of labor at $80-$150/hr.
- High-end brands or hidden elements: $250-$450 if your oven is a premium European brand or a wall oven that must be partially pulled out.
- When it’s not the element: If the element looks fine, the problem might be the thermal fuse, selector switch, relay, or control board ($150-$500+ with labor).
- Quick rule of thumb: If the part is under $80 and you’re comfortable flipping a breaker, DIY is usually worth it. If it’s a wall oven or built-in, consider a pro.
What you’re likely trying to do right now:
- Confirm the right cost range for your oven and brand.
- Decide if it’s a simple DIY swap or a call to a tech.
- Estimate parts and labor-no surprises.
- Check for misdiagnosis-make sure the element is actually bad.
- Learn the quickest safe replacement steps.
Good news: for electric ovens, heating elements are one of the fastest, cheapest fixes in appliance repair. I’ve replaced dozens-most took less time than preheating to 425°F.
Exact costs, parts vs. labor, and a step-by-step replacement guide
Let’s pin down real 2025 pricing based on what’s in your kitchen.
1) Parts price ranges in 2025
- Standard bake element (most freestanding electric ranges): $30-$70.
- Broil element: $30-$80.
- Convection ring element (around the fan): $60-$150.
- Hidden/under-floor bake element (common in newer or premium ovens): $80-$160.
- Premium brands (Bosch, Miele, Thermador): $120-$250.
Elements are usually model-specific. Don’t buy by shape alone-match the part number from your manual, the old element’s tag, or the manufacturer’s site.
2) Labor and visit fees
- Diagnostic/service call: $75-$125 (often applied to the repair if you proceed).
- Labor rate: $80-$150/hr in most metro areas (based on 2025 quotes and common rates reported by Angi/HomeAdvisor; aligns with higher technician wages compared to 2020-2022).
- Time on site: 30-60 minutes for a standard range; 60-90 minutes if a built-in oven must be partially removed.
So if a tech supplies a $60 element, spends 45 minutes at $120/hr, and you pay a $95 diagnostic (applied), your total lands around $215-$275.
3) Electric vs. gas-quick check
- Electric ovens use heating elements (this guide fits you).
- Gas ovens don’t use heating elements; the common failure is the igniter. Typical pro cost: $180-$350.
4) Common cost drivers
- Built-in or double wall oven: More labor to access the rear. Expect +$80-$200 vs. a freestanding range.
- Premium brand or discontinued model: Higher part cost and lead time.
- Convection or hidden element: Trickier to access, pricier parts.
- Location: Coastal large metros trend higher; rural areas trend lower by 10-25%.
| Scenario | Part Type | Part Cost (USD) | Labor Time | Labor Rate | Typical Total (incl. diagnostic) |
|---|---|---|---|---|---|
| Basic freestanding range | Bake element | $30-$60 | 30-45 min | $80-$130/hr | $170-$260 |
| Convection electric oven | Convection ring | $60-$120 | 45-75 min | $90-$140/hr | $220-$340 |
| Hidden bake element (floor) | Hidden bake | $80-$160 | 60-90 min | $100-$150/hr | $260-$420 |
| Premium brand wall oven | OEM element | $120-$250 | 60-90 min | $110-$150/hr | $300-$480 |
| DIY (no pro visit) | Any element | $25-$160 | 20-60 min | $0 | $25-$160 |
5) How to confirm the element is actually bad
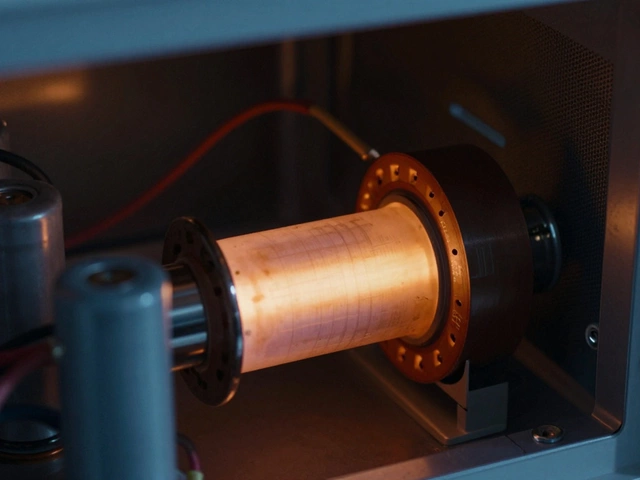
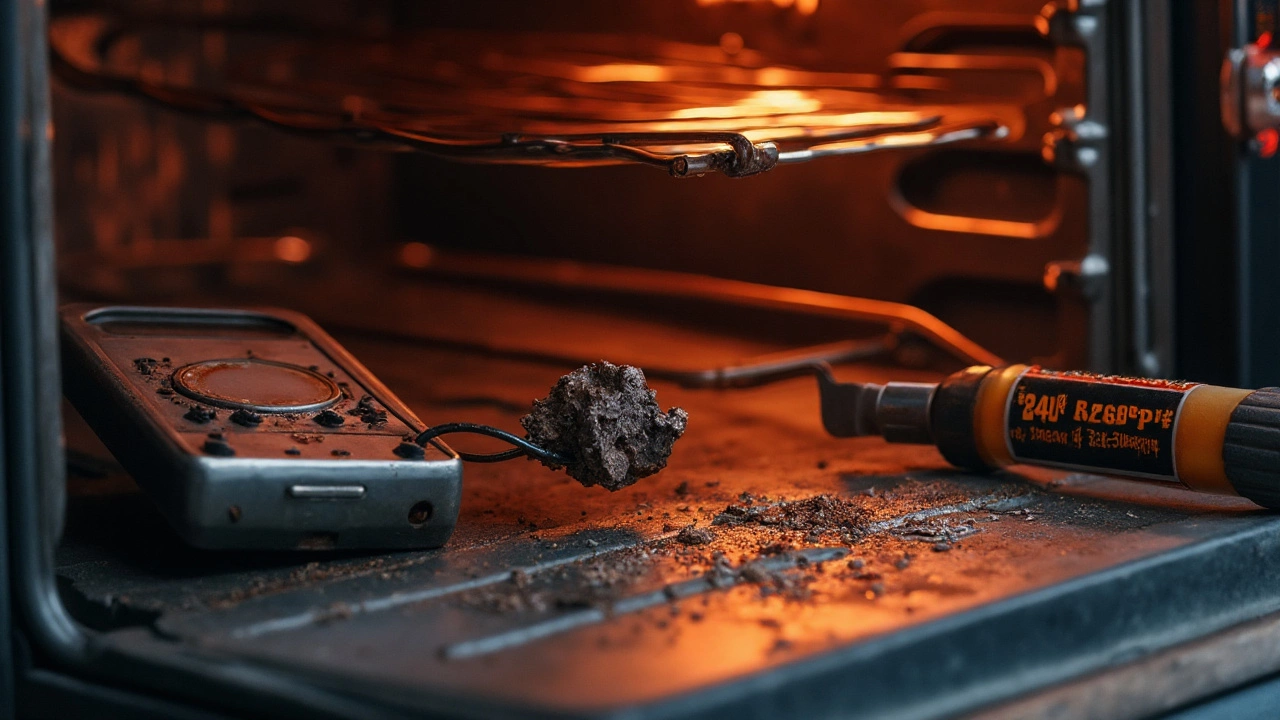
- Visual check: Look for a blister, crack, or burn spot on the element. A break is a dead giveaway.
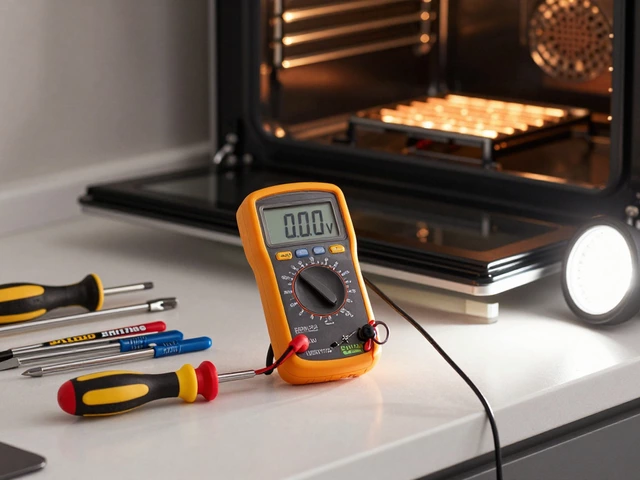
- Continuity test: With power off and one wire removed, a multimeter should read a few dozen ohms (often 10-40Ω). Infinite resistance means it’s open (bad).
- If the element looks fine and reads good: Suspect the thermal fuse/hi-limit, relay, selector switch, or control board. If the oven trips the breaker immediately, consider a shorted element or wiring.
6) DIY replacement steps (standard exposed bake element)
If you can turn off a breaker, you can probably do this. Electric ovens run on 240V-respect it. If anything feels off, stop and call a pro.
- Kill power: Switch off the oven’s double-pole breaker. Verify the clock/control panel is dark.
- Remove racks: Clear your workspace.
- Unscrew the element: Two screws where the element enters the back wall.
- Pull forward gently: Expose the two spade connectors. Don’t let wires slip back into the cavity.
- Disconnect wires: Needle-nose pliers help. Note which wire goes where or snap a photo.
- Match the part: Confirm model number and element shape/length. Reuse the original screws; they often fit better than new ones.
- Install new element: Connect spades firmly (snug, not bent), tuck wires safely, and screw the element back to the wall.
- Power up and test: Turn the breaker on. Preheat to 375°F. The element should glow red within a couple of minutes.
- Final check: No sparking, no smells beyond the usual light burn-off coating for the first heat cycle.
Time: 20-45 minutes for most ranges. Convection ring and hidden elements take longer and may require removing a rear panel or the oven floor.
7) When to call a pro right away
- Wall ovens that need to be slid out of cabinetry.
- Premium brands with tight clearances or fragile trim.
- Symptoms point to controls or relays, not the element.
- You smell melted insulation or see scorched connectors.

Real scenarios, price examples, checklists, and smart rules of thumb
Here are common real-world scenarios, what they cost, and how to keep the bill reasonable.
Scenario A: Standard bake element, Whirlpool/GE/Kenmore freestanding range
- DIY: $35-$60 for the part. Done in 30 minutes.
- Pro: $170-$260 total (diagnostic $85-$100, part $40-$60, labor 30-45 min).
- Tip: Photograph wire orientation. Replace any loose spade connectors while you’re in there (few dollars).
Scenario B: Convection element failed, still bakes but fan bake is weak
- DIY: $70-$120 part, 45-75 minutes (rear panel off, fan cover off).
- Pro: $220-$340 total in most cities.
- Tip: Clean the fan and vents while the cover is off; better airflow, quicker preheats.
Scenario C: Hidden bake element under the oven floor
- DIY: $90-$160 part, 60-90 minutes (pull bottom panel/floor, sometimes side rails).
- Pro: $260-$420 total. Often higher in premium kitchens.
- Tip: Replace the floor panel screws carefully-cross-threads are common and annoying.
Scenario D: Premium brand wall oven (Bosch/Miele/Thermador)
- DIY: $140-$250 part, access may be tricky.
- Pro: $300-$480 total (part + 60-90 minutes + premium diagnostic).
- Tip: If you need to slide the oven out, protect cabinets and counters with thick towels or a moving blanket.
Scenario E: Misdiagnosed-element is fine, control issue instead
- Parts: Control board or relay $150-$350; sensor/thermostat $20-$60.
- Pro: $250-$550 total depending on part availability and labor.
- Tip: Always meter the element first. A quick $20 multimeter saves you from chasing the wrong part.
Quick decision tree
- Element visibly cracked or blistered? Yes → Replace it. No → Meter it for continuity.
- Continuity good? Yes → Check thermal fuse/hi-limit, relays, or control board. No → Replace element.
- Built-in wall oven? If you must unmount the unit, consider calling a pro.
- Oven 12-15+ years old with multiple issues? If repair exceeds ~50% of replacement cost, start shopping.
Cost-saving tips that actually work
- Bring your model number: Prices vary by exact model. The right part first time avoids restocking fees.
- Buy OEM or reputable aftermarket: OEM fits best; quality aftermarket can save 20-30% if reviews are solid.
- Waive the second visit: If you book a pro, ask if they can source the part same-day. Two trips = two charges.
- Bundle repairs: If your range also needs a sensor or gasket, doing both in one visit lowers labor cost.
- Warranty check: Many ovens have one-year parts coverage. Credit card extended warranties sometimes add another year.
What the pros look at first (so you can, too)
- Breaker and terminal block: Loose lugs cause heat loss and burnt wiring. If you see soot at the rear power block, stop and call a tech.
- Temperature sensor (ohms): Most read ~1080Ω at room temp. If it’s far off, the oven may never call for full heat.
- Door gasket and calibration: Heat escaping makes preheat crawl. A $20 gasket can transform performance.
What the numbers say
National labor rates for appliance repair in 2025 commonly land in the $80-$150/hr band, and diagnostic fees in the $75-$125 range, according to aggregated service price reports from Angi/HomeAdvisor and trends that track with higher technician wages reported since 2023 (BLS wage data shows steady increases for related trades). Parts pricing has also crept up 5-12% versus 2022, especially for premium-brand OEM components.
Checklist: before you spend
- Confirm it’s an electric oven (elements) vs. gas (igniter).
- Flip the breaker off/on once to rule out a tripped leg on the 240V circuit.
- Inspect the element for obvious damage and the wiring for scorch marks.
- Test continuity on the element if it looks intact.
- Check your warranty and extended coverage.
- Price the part by exact model number from at least two sources.
Mini cost formula you can use
- DIY total = Part price + $0 labor.
- Pro total (typical) = Diagnostic fee + Part price + (Labor rate × Time).
Example: $95 diagnostic + $55 part + (1.0 hr × $120) = $270.
When repairing isn’t worth it
- Your oven is 15+ years old and also has control or relay issues.
- Repair quote is more than half the price of a similar new unit. Mid-range electric ranges often cost $700-$1,200 in 2025.
- Parts are discontinued or on backorder for weeks and you cook daily.
Safety musts
- Kill the breaker. Don’t trust the front panel power button.
- Avoid yanking wires; support them so they don’t slip behind the back wall.
- Use insulated tools. If you see damaged insulation or brittle wiring, stop.
Pro tip on stubborn screws
If the mounting screws are seized, add a drop of penetrating oil and give it 10 minutes. Use a properly sized screwdriver-stripped heads turn a 30-minute job into an hour.
What if the new element doesn’t glow?
- Check both breakers are fully on; a 240V oven uses two linked breakers.
- Confirm both spade connectors are tight and not reversed on a dual element.
- Test the temperature sensor; a bad sensor can stop the control from driving full power.
- If it blew immediately, suspect a short to chassis or a nicked wire touching metal.
Table: parts vs. labor at a glance
| Part Type | Typical Part Price | Typical Labor Time | Notes |
|---|---|---|---|
| Bake element (exposed) | $30-$70 | 30-45 min | Fastest fix; most common failure |
| Broil element | $30-$80 | 30-45 min | Easy access from the top of the cavity |
| Convection ring | $60-$150 | 45-75 min | Requires removing fan cover and rear panel |
| Hidden bake (under floor) | $80-$160 | 60-90 min | More disassembly, pricier parts |
| Premium OEM element | $120-$250 | 60-90 min | Brand-specific, often special order |
What about double ovens?
You’ll pay per cavity if both elements need replacing. If the tech is already there, ask for a combined labor quote to reduce costs. Often, the second element adds only the part price plus a small labor increment.
Brands that tend to be budget-friendly to repair
- GE, Whirlpool, Frigidaire, Amana: Parts are widely available and usually under $80.
- Samsung, LG: Reasonable parts prices; be sure to match exact model numbers.
- Bosch, Thermador, Miele: Expect higher part costs and longer lead times.
A word on aftermarket parts
Solid choice when reviews are strong and sellers specify your model. Cheap, no-name elements can run hot or fail early. If you use aftermarket, keep your receipt and packaging for easy returns.
Proof you can do this
Most elements attach with two screws and two spade connectors. That’s it. The hardest part is usually not dropping a wire back into the rear cavity. A small clip, painter’s tape, or gentle pull with pliers keeps them in reach.
If you’re renting
Don’t touch it without the landlord’s OK. They may have a preferred service or warranty coverage. Document the issue with a photo of the element and the control display.
Sustainability angle
Swapping an element instead of junking a stove saves a big appliance from the landfill and keeps heavy metals out of the waste stream. One small part can add years to the oven’s life.
Mini-FAQ
- How long do oven elements last? Often 5-15 years, shorter if you broil a lot or bake sugary spills onto the element.
- Are elements universal? No. Many look similar but differ in length, bends, and mounting tabs. Match by model number.
- Can I bend an element to make it fit? No. You’ll damage it or cause a hot spot and early failure.
- Why did the element fail? Repeated heat cycles, spills baking onto it, or a surge. Sometimes connectors loosen and arc.
- Should I replace the temperature sensor too? Only if it tests out of spec. It’s a cheap part ($20-$40) and easy to do while you’re in there if it’s old.
- Is it safe if the element sparks once on first heat? A tiny flicker on first power-up can happen; persistent arcing or bright sparks means shut it off and recheck connections.
Troubleshooting by symptom
- Oven won’t heat at all: Check both breakers are on; test bake element and thermal fuse; verify door lock isn’t stuck in self-clean mode.
- Preheats very slowly: Weak element, bad sensor, or door gasket leak.
- Trips breaker: Look for a shorted element (burn mark where it touched metal) or damaged wire insulation.
- Only broil works: Bake element likely failed; replace it.
- Only bake works, no broil: Broil element or its relay is out.
- Convection fan runs, but temps are off: Convection ring element or sensor problem.
Parts sourcing tips
- Use the full model/serial sticker from the oven frame (often visible with the door open).
- Compare photos and measurements before buying.
- Keep the old element until the new one is installed and tested.
If you call a pro, ask these questions
- Is the diagnostic fee applied to the repair?
- Do you stock my element or can you source it today?
- What’s the total out-the-door estimate-part, labor, diagnostic, tax, any trip fees?
- Warranty on part and labor? 90 days to 1 year is common.
Fast reality check
If your quote is $400+ for a standard freestanding range with an exposed element, ask why. It might be a premium part, a built-in configuration, or additional issues. If not, get a second quote.
Next steps
- Identify your oven model number and confirm electric vs. gas.
- Do a 5-minute visual and continuity test on the element.
- Price the exact part and decide DIY vs. pro using the ranges above.
- If built-in or premium brand, schedule a tech and aim for one-visit completion.
If you want a sanity check on your model and part number, jot them down and compare against the part picture and mounting tabs. Once you match the shape and connectors, you’re 95% of the way there-cost clear, fix clear, dinner back on track.