Discovering that your water heater is out of order can throw a wrench into the basic comforts of home life. No one enjoys the prospect of a cold shower or struggles involving appliances gone awry. While the challenge might seem daunting, tackling water heater issues doesn't have to be a Herculean task. With a bit of patience and some know-how, you can address many common problems yourself, saving both time and money.
Before diving into the practical steps of water heater repair, it’s important to have a grasp on what might be causing the issue. Whether it's a lack of hot water, peculiar noises, or leaks, understanding the root cause is your first step towards a solution. So, let's delve into this journey of making your water heater function smoothly again.
- Understanding Common Water Heater Problems
- Safety Precautions Before You Begin
- Inspecting Power Supply and Connections
- Dealing with Temperature and Pressure Issues
- How to Handle Leaks and Sediment Build-Up
- When to Seek Professional Help
Understanding Common Water Heater Problems
Many homeowners at some point experience issues with their water heater. These problems can turn what should be a moment of relaxation under your hot shower into a perplexing challenge. But don't let the frustration boil over just yet; the keys to solving these issues are often within reach, starting with a solid understanding of the causes. The most frequent complaint is a lack of hot water. Many times, it's due to a malfunctioning thermostat or heating element in electric models, while in gas heaters, the pilot light might go out. Other times, it's the sediment build-up that acts like an insulator, making it harder for the heater to work effectively.
Another prevalent issue is noisy water heaters. Sounds like popping, rumbling, or ticking are usually caused by debris or sediment settling at the tank's bottom. As water is heated, trapped sediment makes noises, like tiny explosions, which can be alarming but rarely indicates a major problem. Regular maintenance, such as flushing the water heater tank annually, can help reduce noise and improve efficiency. Leaks are also a common concern. These can be due to a faulty valve or excessive pressure in the tank. In more severe cases, an old tank may develop holes or cracks, requiring replacement. A leak not only wastes water but can cause significant damage to your home if not addressed promptly.
Additionally, a dip in water temperature or the water taking longer than usual to heat up may signal worn-out heating elements, a thermostat set too low, or even electrical issues. Then there's the issue of discolored water, often a result of rust or corrosion inside the tank. An anode rod, which prevents tank corrosion, needs regular inspection and replacement to avoid such problems. Be proactive in addressing these symptoms to prolong the life of your water heater. Interestingly, the average lifespan of a water heater is between 8 to 12 years, but with proper care, some units last even longer.
"Preventive maintenance is the key to a longer-lasting water heater," advises Marcus Hall, a seasoned plumber with over 20 years of experience in leading water heater repairs. "Regular checks and understanding signs of wear can save you from unexpected cold showers."
Lastly, energy inefficiency can be a hidden issue. If your energy bills are rising without a corresponding increase in usage, your water heater might be running inefficiently, potentially due to age or damaged components. Pay close attention to these spikes and consider a professional inspection to identify underlying issues. To further grasp these complexities, here's a simple breakdown of common problems, symptoms, and potential fixes:
| Problem | Symptom | Potential Fix |
|---|---|---|
| No Hot Water | Cold water only | Check thermostat and heating elements |
| Strange Noises | Popping or ticking sounds | Flush tank to remove sediment |
| Leaks | Water pooling | Inspect valves and tank for damage |
Safety Precautions Before You Begin
Before rolling up your sleeves to fix your water heater, pause for a moment to think about safety. It's crucial to handle the repair process with care, not just for the sake of the water heater, but to ensure your own well-being. When dealing with electrical appliances and hot water systems, minor missteps can lead to more significant problems, such as electrocution or scalding. Begin by ensuring that the power supply to your water heater is turned off. Locate your home's circuit breaker and flip the switch dedicated to your water heater. This might sound elementary, but it is the first line of defense against any accidental shocks or mishaps.
Another critical step involves checking the temperature setting on the thermostat. The ideal setting is around 120 degrees Fahrenheit. Anything beyond that increases the risk of scalding and can put undue strain on the water heater, potentially leading to premature wear and tear. If you're unsure or spot corrosion around electrical connections, it's often wise to consult a professional as tampering without proper knowledge can escalate the issue. Home maintenance is vital but so is knowing your limits.
Handling water heaters also means dealing with pressure. Without proper management, the hot water tank can become a dangerous object. To relieve pressure carefully, check the pressure release valve. A simple test involves lifting the valve slightly and allowing some water to escape, thus releasing built-up pressure. If the valve doesn't operate smoothly, it could be defective, which poses a risk and should be addressed promptly. Remember, issues at this stage might be minor but can hint at larger underlying problems.
"Safety should always come first, especially with appliances that utilize both water and electricity," advises the Electrical Safety Foundation International (ESFI), emphasizing the importance of cautious handling. Their insights into electrical safety are respected and can provide additional guidance when navigating potentially hazardous repairs.And let's not overlook proper attire—protective gear can be as simple as wearing gloves and ensuring the area is well-ventilated. Sometimes, a quick tidy-up of the area around the base of the water heater isn't just about cleanliness; it’s about creating a safe workspace where you're less likely to trip or reach in danger zones.
Here's a tip that's especially useful if you're dealing with an electric water heater: have a non-contact voltage tester handy. Before interacting with any wires or connections, use this tool to double-check that there's no live current. It's an inexpensive addition to your toolkit, but invaluable in preventing accidental electric shocks. Moreover, taking the time to organize your tools can mean the difference between a smooth-fix job and a chaotic scramble.
Inspecting Power Supply and Connections
When your water heater stops working, one of the first steps is to examine the power supply and connections. It’s surprising how often the remedy is simply a nudge away in the breakers or a reconnect away in the power cords. The initial step involves locating the circuit breaker dedicated to your water heater. Typically, this is found in the home's electrical panel, and you'll want to check if it has tripped. Flipping it off and then on might just be the solution.
Sometimes, a more thorough inspection is required. Ensure that the unit is receiving power, often indicated by a working pilot light or visible display. Especially for electric models, examine the power cord and verify that it's securely plugged into the outlet. If your system involves hardwiring, looking over the connections in the junction box can reveal loose wires that need attention. For gas-powered heaters, ensure the gas valve is open and the pilot light ignited properly. This step might need some courage, but with proper guidance, it's manageable.
According to an industry expert at ENERGY STAR, "A surprising number of household heating issues stem simply from overlooked or minor electrical faults."
While handling electricity or gas, safety is crucial. Always double-check that all safety protocols are followed, like turning off the main power source before working, and using a voltage detector to confirm no current remains. Having rubber gloves and standing on a dry, insulated surface is a handy precaution in case surprises lurk around the circuit. For electrical connections, it's beneficial to check the thermostat settings, which might have changed inadvertently, impacting the heater's function.
Going through technical manuals specific to your model can also provide insights. If they are elusive, most brands now offer digital versions online. In these manuals, you might find diagrams of the power setup and typical troubleshooting steps. Following these can swiftly guide you to solutions tailored to your specific situation. Enlisting a friend with hands-on skills in electrical work can provide both guidance and an extra hand to cross-check each move. Each step taken with care not only ensures safety but also builds confidence with every small achievement.
Troubleshooting Electrical Elements
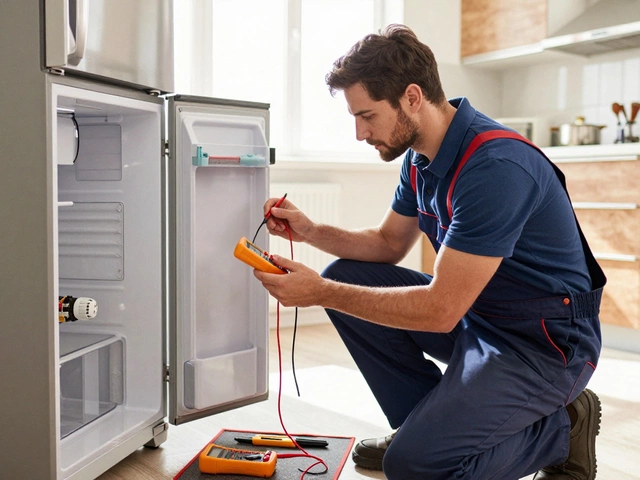
If the power supply seems intact but issues linger, the fault could be within the water heater itself. Many have internal fuses or other protective mechanisms that might have blown in response to power surges or faults. Manufacturers often design these elements with replaceability in mind, adding a layer of security yet simplicity in case repairs are needed. Checking the resistance of heater elements using a multimeter can diagnose internal failures. However, interpreting the readings accurately may require basic electrical knowledge, or at least a thorough guide or tutorial, which you can find online or in user manuals.
Another aspect worth examining is the thermostat and heating elements. These are typically housed behind access panels on the unit. Once you’ve ensured power is off, removing these covers can allow you to inspect for corrosion or damage. Cleaning contacts and replacing worn parts can sometimes restore functionality splendidly. However, at this stage, if comfort in handling electrical tools wavers, calling in a professional might be the best course of action. Repairing water heaters can be a journey into learning and DIY triumphs, yet knowing one's limits can ensure a happy and safe home.
Dealing with Temperature and Pressure Issues
If your water heater is struggling to maintain the right temperature, or you're hearing odd noises from the tank, it's possible that temperature and pressure issues are at play. These components are crucial in ensuring that the heater functions properly, and when they go awry, they're bound to cause problems. First, let's address temperature concerns. You need to ensure the thermostat is set correctly. Experts recommend a setting of around 120 degrees Fahrenheit, which is not too hot and not too cold for most households. Adjusting the thermostat can sometimes immediately resolve the issue, providing a comforting wave of hot water almost instantly.
In some cases, the thermostat itself might be faulty. A multimeter can determine if this component is working correctly. If the multimeter shows no continuity, it's a sign that the thermostat needs replacement. This is a relatively simple task for those handy around the house. However, if you aren't comfortable, it's wise to contact an expert who can help without adding safety risks. It’s easy to assume that any related noise might just be a nuisance, but it can indicate sediment build-up impacting water temperature consistency. Flushing the tank periodically can make a world of difference, both in temperature stability and noise reduction.
Now, let's switch gears and talk about pressure. The pressure relief valve, usually located on the tank's side, is there to prevent excessive pressure build-up. If it's faulty or leaks, that can spell trouble for your water heater. Not only can this impact its efficiency, but it may also pose a safety hazard. Lifting the valve gently and allowing some water to flow through it will indicate if it’s clogged or malfunctioning. If water doesn’t escape when the valve is lifted, that’s your cue that a replacement is necessary.
Sometimes excess pressure can manifest as the tank vibrating or even producing a boiling-like sound. This is caused by excessive pressure and the water heating too fast. It could be tied to the thermostat settings or sediment build-up. Always keep an eye on the temperature and pressure relief valve function--knowing when it’s time to replace it can prevent far more serious issues from developing.
Understanding Temperature and Pressure Ratings
It might be helpful to familiarize yourself with the ratings applicable to your water heater model. Every heater has limits, and while it's built to withstand a fair amount of pressure—and temperature swings—it does have maximum thresholds. Illustrating this, consider a well-functioning water heater: it balances pressures around 20 PSI (pounds per square inch) during heating. While 80 PSI is commonly considered a red flag, it’s advisable to keep your home’s water pressure between 50 and 60 PSI. If modifications are required, a plumber can install a pressure reducing valve to ensure ideal conditions.
“Water heaters that have consistent sediment issues resulting in poor temperature regulation often benefit from annual maintenance,” advises plumbing expert John Simmons. “Regular checks can prevent unexpected spikes in pressure or temperature.”
In tackling these issues yourself, remember it’s always about knowing your limits. While many steps are straightforward, safety is paramount in handling any repairs related to gas or electric-powered systems. Should doubts arise, bringing in a professional might be the best step to preserve the harmony and safety in your home.

How to Handle Leaks and Sediment Build-Up
When your water heater starts leaking, or you suspect there's a build-up of sediment, it can be tempting to panic. But remember, understanding the root cause can often make things much easier to handle. Leaks, for instance, are frequently attributed to loose connections or weakened tank integrity. On the other hand, sediment build-up in your water heater usually results from the minerals in hard water collecting at the bottom of the tank. Addressing these issues promptly is crucial not only because they affect the efficiency of your heater but also because they can lead to more significant problems if left unchecked.
To effectively deal with leaks, your first step is to identify their source. Inspect the pipes and connections to your water heater for any loose fittings or cracks. A common mistake is to tighten everything with force; this approach might occasionally worsen the problem. Instead, focus on a gentle, methodical tightening, and always remember to turn off the water supply before making any adjustments. Leaks may also emanate from the tank itself due to corrosion, and while a temporary fix might involve patching the hole, a long-term solution often requires replacing the entire tank.
"It's better to address a minor leak than to face the flood of replacing an entire system," says David Lewis, a seasoned plumbing expert.
Dealing with sediment build-up often requires a flush of your water heater. Sediment can create a barrier between the burner and water, making the unit less efficient. To perform a flush, first, switch off your water heater and allow the water to cool for safety. Attach a hose to the drainage valve at the bottom of the tank and lead it to a nearby drain or outside area. Open the valve, allowing the water and accumulated minerals to be expelled. Refill your tank and consider installing a water softening unit to prevent further sedimentation. Sediment not only affects performance but can also cause rumbling noises during water heating, akin to a teapot being boiled enthusiastically on a stove.
Sometimes, leaks and sediment issues intertwine when an excessive build-up increases internal pressure, causing leaks. If you repeatedly encounter these issues, evaluating the hardness of your water supply could lead you to invest in preventative equipment. The significance of being proactive cannot be overstated – frequent maintenance checks help identify the early stages of leaks and sedimentation, reducing the possibility of costly repairs down the line. Remember, attention to small details in maintaining your water heater can provide peace of mind and efficiency in the long run.
When to Seek Professional Help
Sometimes, a malfunctioning water heater poses challenges that are beyond the scope of do-it-yourself fixes. For a homeowner, the line between a simple repair and a more complicated issue can be thin and elusive. Some minor problems can escalate, potentially leading to damage or safety hazards. If you notice persistent issues that don’t resolve with basic troubleshooting, it’s smart to call a professional. Persistent leaks, unusual noises like banging or screeching, and frequent pilot light outages suggest deeper problems that require expert intervention. It's also crucial to remain mindful of the potential for electrical and gas hazards surrounding water heater repair. A trained technician can safely navigate these dangers, ensuring your heater not only begins working again but operates safely over the long term. Taking the step of hiring a professional might seem like giving up, but it’s actually the wisest decision in many situations.
One tangible indicator of needing professional assistance is inconsistent hot water temperature. When your heater lacks the ability to maintain a stable hot water output or takes an unusual amount of time to heat water, internal components like the thermostats or heating elements might be compromised. A certified water heater repair expert can accurately diagnose such issues, preventing further inconvenience. Another common problem that necessitates professional help is any kind of water pooling around the base. This often indicates a leak that is beyond a simple fix and could lead to significant water damage if left untreated. Moreover, modern water heaters often include complicated components that require specific technical skills and knowledge to repair or replace.
Recognizing Dangerous Signs
A serious sign that you need a professional involves the presence of rust-tinted water coming from your faucets. This means there’s likely corrosion within the tank, and it’s only a matter of time before the entire unit fails. For gas water heaters, the smell of gas—a sulfuric or ‘rotten eggs’ odor—is a red flag for concern. In such situations, shut off the gas supply immediately and contact your utility company, followed by a water heater technician. Ignoring these signs could lead to hazardous situations, including potential explosions or significant water damage. With electrical heaters, tripping breakers or fuses are suggestive of wiring issues or faults that necessitate an evaluation from an experienced electrician to ensure the problem isn't part of a larger electrical issue.
According to a leading home services company, "As much as 20% of water heater failures report significant property damage, highlighting the importance of timely professional inspections and repairs."
Lastly, consider professional service if your unit is nearing or has surpassed its expected lifespan of about 8 to 12 years. Aging water heaters are more vulnerable to catastrophic failure, making the case for regular inspections by a knowledgeable technician. In cases where repairs are frequent and costly, it might be economically wiser to consult with a professional about replacing the unit altogether, considering new models offer enhanced energy efficiency, saving you money in the long run. Acting proactively by seeking expert help not only safeguards your investment but also brings peace of mind knowing your water heating system is in capable hands.
